

Blog Details
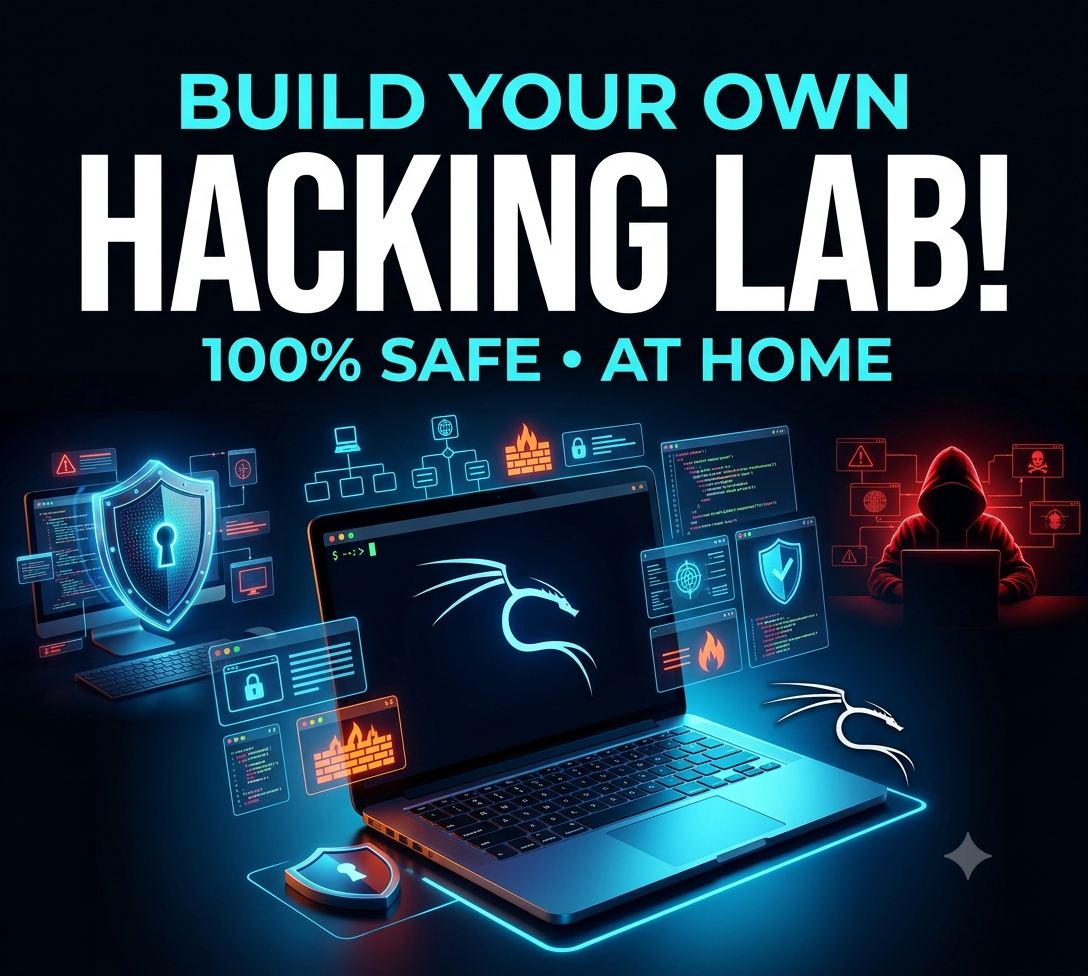
How to Build a Safe Hacking Lab at Home with Kali Linux
Quick Answer: How Do You Build a Safe Hacking Lab at Home?
To build a safe hacking lab, install a hypervisor like VirtualBox or VMware on your computer. Create a Kali Linux virtual machine as your attacker system. Add intentionally vulnerable machines such as Metasploitable, DVWA or OWASP Juice Shop as targets. Connect them through an isolated virtual network (host-only or internal), take snapshots before every experiment, and never point your tools at anything you do not own or have written permission to test.
Key Takeaways
- A hacking lab is a private, isolated practice environment on your own computer.
- You can build a useful lab for free, on a normal laptop with 8 GB of RAM.
- Isolation is the heart of safety. Your vulnerable machines must never touch the open internet.
- Snapshots let you break things and recover in seconds.
- Practising only on systems you own keeps you legal and builds good professional habits.
- Our free playlist walks through every step, and each lesson uses this exact lab.
Why This Blog Exists (And Why It Is Free)
I want to start with the reason behind this post.
Every week, people message me with the same story. They watched a few hacking videos, got excited, and then asked a worried question: "Where do I actually practise? I don't want to get into trouble."
That question is the right one.
Too many tutorials show tools and skip the safe place to use them. Beginners then test random websites, scan their college Wi-Fi or poke at a friend's network. Some get warnings. Some get into real legal trouble. Many just quit out of fear.
That is exactly the problem Mission 100K was started to solve.
Mission 100K is our goal of helping 100,000 learners build real cybersecurity skills for free. Not just watching, but learning safely, legally and with confidence. A home lab is the foundation of all of it.
So this guide is not only a technical tutorial. It is a promise: you can learn ethical hacking properly without risking anything or paying anyone.
What Is a Hacking Lab?
A hacking lab is a private, controlled environment where you can legally practise security testing on systems you own. It usually runs on virtual machines inside your own computer.
Think of it like a flight simulator. Pilots do not learn to fly by taking a real plane into a storm on day one. They practise in a simulator where mistakes are safe.
A hacking lab is your simulator.
It has two basic parts:
- The attacker machine. This is your Kali Linux system, loaded with tools.
- The target machines. These are systems that are deliberately weak, built for you to practise on.
Both live in a closed network. Nobody else's property is involved. Nobody can be harmed.
Why Do You Need a Home Lab?
You might wonder if you can skip this and just watch videos. You can, but you will learn much less.
Here is what a lab gives you.
It keeps you legal. Every action happens on your own machines.
It lets you fail safely. Break a system, reset it and try again. That is how skills are built.
It makes theory real. Reading about port scanning is one thing. Watching Nmap discover services on your own virtual target is another.
It builds your portfolio. Your lab notes and walkthroughs become proof of what you can do.
It is free and available any time. No subscription, no internet requirement once everything is downloaded.
Is It Legal to Build a Hacking Lab?
Yes. Building a lab and practising on your own virtual machines is completely legal.
The law cares about authorisation. Testing systems you own, or systems where you hold clear written permission, is fine. Testing anyone else's network, website, phone or device without permission is a crime in almost every country, including India.
Here is the rule I want you to carry through your whole career:
If it is not yours, and you do not have written permission, do not touch it.
This includes your neighbour's Wi-Fi, your college network, your office systems and any "just for fun" website. A lab exists so you never feel tempted.
What Do You Need to Build the Lab?
The good news is that the requirements are modest.
Minimum and Recommended Hardware
|
Component |
Minimum |
Recommended |
|---|---|---|
|
RAM |
8 GB |
16 GB or more |
|
Processor |
Dual-core with virtualisation support |
Quad-core or better |
|
Storage |
100 GB free |
250 GB or more (SSD) |
|
Internet |
For downloads |
Any stable connection |
If you have only 4 GB of RAM, do not panic. You can still run one light Kali VM and one small target at a time. It will be slower, but it works.
Check That Virtualisation Is Enabled
Most beginners get stuck here.
Your processor needs hardware virtualisation (called Intel VT-x or AMD-V). It is often switched off by default in the BIOS or UEFI settings.
If your virtual machine says it cannot start a 64-bit system, enter your BIOS and enable virtualisation. The setting is usually named "Intel Virtualization Technology", "SVM Mode" or something similar.
Software You Will Need
All of it is free for personal learning use:
- A hypervisor (VirtualBox or VMware)
- A Kali Linux image
- A few intentionally vulnerable target machines
- A text editor or note-taking app for your lab notes
Step 1: Choose Your Virtualisation Software
A hypervisor is the program that lets you run virtual computers inside your real one.
Which Hypervisor Is Best for Beginners?
VirtualBox is the most popular beginner choice. It is free, open source and works on Windows, Linux and macOS (with some limits on newer Apple chips).
VMware Workstation or VMware Fusion is smooth and polished. Broadcom has offered personal-use versions for free, but licensing has changed in the past, so check VMware's official site for current terms.
Hyper-V is built into some editions of Windows. It works, but its networking and graphics are less beginner-friendly for Kali.
Proxmox is a powerful option if you have a spare computer to turn into a dedicated lab server. It is better for later, not day one.
My Recommendation
Start with VirtualBox. It has plenty of tutorials, a friendly interface and no cost.
You can always move to something else once you understand how labs work.
Step 2: Download and Install Kali Linux
Now for the main tool.
Where Should You Download Kali?
Always download from the official Kali Linux website. Never use a random mirror, a pirated "pre-hacked" version or a file shared on social media.
A fake Kali image could contain malware, which is the exact opposite of what you want in a safe lab.
Kali offers a few formats:
- Pre-built virtual machine images for VirtualBox and VMware. These are the fastest option.
- Installer ISO for a manual installation.
- Live images for running from a USB drive.
For your lab, the pre-built virtual machine image is the easiest.
Pre-Built Image vs Manual Install
A pre-built image saves time. You import it, start it and you are inside Kali within minutes.
A manual ISO install teaches you more about partitions and system setup. It takes longer and has more places to make mistakes.
If you are brand new, use the pre-built image first. You can try a manual install later as practice.
Verify Your Download
This is a professional habit worth learning early.
Kali publishes checksums, which are unique fingerprints for each file. After downloading, compare your file's checksum to the official one. If they match, the file has not been tampered with.
It takes one minute and protects you from corrupted or malicious downloads.
Basic VM Settings That Work Well
When creating or adjusting your Kali VM, these settings are a good starting point:
- Memory: 4 GB if you have 16 GB total, 2 GB if you have 8 GB
- Processors: 2 cores
- Disk: 60 to 80 GB (dynamically allocated)
- Video memory: as high as the tool allows (usually 128 MB)
- Network: we will set this up carefully in the next step
After the First Boot
Do these things right away:
- Change the default password. Pre-built images use well-known default credentials. Replace them.
- Update the system. Run the standard update and upgrade commands with
apt. - Install guest tools if your hypervisor offers them, so copy-paste and screen resizing work.
- Take your first snapshot. Name it "Fresh Kali - Clean".
That last step will save you many times over.
Watch the full installation on YouTube: https://www.youtube.com/playlist?list=PLYDHfwsEk0RY
Step 3: Understand and Set Up Lab Networking
This is the most important step for safety, and the one most tutorials rush through.
Your network settings decide who can talk to whom. Get it right, and your vulnerable machines stay completely sealed off.
What Are the Main Virtual Network Types?
|
Mode |
What It Does |
Use It For |
|---|---|---|
|
NAT |
VM can reach the internet, but outsiders cannot reach the VM |
Kali updates and downloads |
|
NAT Network |
Like NAT, but VMs can also talk to each other |
A shared lab with internet access |
|
Host-only |
VMs talk to each other and to your host, with no internet |
Safe, isolated practice |
|
Internal network |
VMs talk only to each other, nothing else |
Maximum isolation |
|
Bridged |
VM appears as a real device on your home network |
Rarely wanted for vulnerable machines |
Why Is Bridged Mode Risky?
Because a bridged VM sits directly on your home network, right beside your phone, laptop and family devices.
If that VM is deliberately vulnerable, you have just placed a weak machine on the same network as your real life. Avoid bridged mode for targets.
It can be useful for a few special cases, like wireless practice with a USB adapter, but not for everyday lab work.
A Simple, Safe Network Design
Here is a design I recommend to almost every beginner.
Kali VM has two network adapters:
- Adapter 1: NAT. This lets Kali reach the internet for updates and tool installs.
- Adapter 2: Host-only (or internal). This connects Kali to your targets.
Every vulnerable target has only one adapter:
- Host-only (or internal) network. No internet. No home network.
The result is simple. Kali can reach the targets and the internet. The targets can reach only Kali.
If a target is compromised, it has nowhere to go.
A Simple Way to Picture It
Imagine a glass room. You (Kali) can walk in and out of the room and also go outside to the street. The vulnerable machines live inside the room with the door locked from the outside. They can see you, but they cannot leave.
That is isolation.
Check Your Isolation
Before you start attacking anything, test the setup.
From each target, try to ping an external website or your home router. It should fail.
From Kali, ping the target's IP address. It should succeed.
If the target can reach the internet, fix your network settings before doing anything else.
Step 4: Add Your Target Machines
Now your lab needs something to practise on.
All of the following are built for learning, legally free and safe when kept in an isolated network.
Metasploitable
Metasploitable is an intentionally vulnerable Linux machine created for practising network penetration testing. It is full of outdated services, weak passwords and known flaws.
It is ideal for learning Nmap, vulnerability scanning and Metasploit basics.
A very important warning: Metasploitable is extremely insecure by design. Never connect it to the internet or a bridged network. Keep it in host-only or internal mode only.
DVWA (Damn Vulnerable Web Application)
DVWA is a deliberately weak web application. It lets you practise SQL injection, cross-site scripting, command injection, file upload flaws and more.
It includes difficulty levels, so you can start easy and move up as you improve.
OWASP Juice Shop
Juice Shop is a modern, deliberately insecure web app that mirrors the OWASP Top 10 and beyond. It is gamified, with challenges and hints.
It is a great next step after DVWA and fun for beginners.
OWASP WebGoat
WebGoat is a guided learning platform. It teaches web vulnerabilities with lessons and exercises rather than just a vulnerable page.
VulnHub Machines
VulnHub hosts downloadable vulnerable virtual machines created by the community. Many are designed like small capture-the-flag challenges.
They are excellent practice once you finish the basics.
Windows Evaluation Machines
Real-world networks include a lot of Windows. Microsoft offers time-limited evaluation versions of Windows and Windows Server for testing and learning. Check Microsoft's official evaluation centre for what is currently available.
Windows targets help you practise topics like SMB, Windows enumeration and later, Active Directory.
Docker for Lightweight Targets
If your computer is modest, Docker can run vulnerable web apps in lightweight containers instead of full VMs. This saves memory and starts faster.
Keep the containers on a local-only network and do not expose their ports to the wider internet.
What Should You Start With?
Do not install everything at once. Start small:
- Kali Linux (attacker)
- Metasploitable (network practice)
- DVWA or Juice Shop (web practice)
That trio is enough for your first two or three months.
Step 5: Use Snapshots Like a Professional
If there is one feature that makes a lab pleasant, it is snapshots.
What Is a Snapshot?
A snapshot is a saved state of a virtual machine that you can return to instantly. It captures the system, settings and files at one moment in time.
Break something? Roll back. Mess up a configuration? Roll back. Want to repeat an exercise? Roll back.
When Should You Take Snapshots?
- Right after installing Kali and updating it
- Before installing any big tool or kernel update
- Before every attack exercise on a target
- After completing a clean, working configuration
Name them clearly. "Kali clean 2026-11" is much better than "Snapshot 3".
A Small Warning
Snapshots take disk space, and long chains of them can slow a VM. Delete old ones you no longer need.
Snapshots are also not backups. If your host disk fails, they go with it. Export important VMs to an external drive from time to time.
Step 6: Practise Your First Safe Exercises
A lab is only useful if you use it. Here is a gentle first set of exercises.
Exercise 1: Discover Your Targets
From Kali, find the IP address of your target using a basic network scan of your host-only subnet. Confirm that Kali can see it.
This teaches you IP addressing and host discovery.
Exercise 2: Scan for Open Ports
Use Nmap against your Metasploitable machine. Look at which ports are open and which services and versions are running.
Write down what you find. Try to explain, in your own words, what each service does.
Exercise 3: Capture Traffic
Open Wireshark on Kali and watch the packets while you scan. Notice the patterns that scans create.
This is also how defenders learn to detect attacks.
Exercise 4: Test a Weak Login
On a target in your lab, practise checking weak or default credentials. See how quickly poor passwords fall.
The lesson is defensive: use long, unique passwords and turn on multi-factor authentication.
Exercise 5: Break a Web App
Open DVWA in your browser. Set the difficulty to low. Try a basic SQL injection or cross-site scripting exercise from the on-page hints.
Then look at the source code and see why it was vulnerable. Understanding the fix matters as much as the attack.
Exercise 6: Write It Up
After every exercise, write a short note. What did you try? What worked? What failed? What did you learn?
This habit alone will set you apart from most beginners.
Safety Rules for Your Hacking Lab
These rules protect you, your family and your future career. Please read them twice.
1. Keep vulnerable machines isolated. Use host-only or internal networks. Never bridge them to your home network.
2. Never scan what you do not own. That includes your router, your ISP, other devices in the house and public IP ranges.
3. Keep your real data separate. Do not store personal files, banking details or saved passwords inside lab VMs.
4. Download only from official sources. Fake tools and pirated images often contain malware.
5. Keep your host system updated. Your main operating system is the foundation. Patch it regularly and keep antivirus or built-in protection active.
6. Be careful with shared folders and clipboards. Turn off shared folders and drag-and-drop between host and vulnerable VMs unless you really need them.
7. Snapshot before you experiment. It takes ten seconds and prevents hours of rebuilding.
8. Do not run unknown malware samples in your lab. Real malware analysis needs a much stricter, dedicated setup. As a beginner, stay away from live samples.
9. Tell your family. If you share a home network, let others know what you are practising so nobody is alarmed.
10. Keep a written scope. Even in a lab, write down what you are testing. It builds the habit you will need in professional work.
Common Problems and How to Fix Them
Every beginner meets a few of these. Do not worry, they are normal.
"My VM will not start."
Check that virtualisation is enabled in the BIOS. On Windows, features like Hyper-V or certain security options can conflict with VirtualBox, so you may need to turn them off.
"Kali is very slow."
Give it more RAM and CPU cores if you can. Close heavy apps on the host. Use an SSD if possible. Also install the guest tools.
"The VMs cannot see each other."
This is nearly always a network setting. Confirm that both machines use the same host-only or internal network name. Check their IP addresses are in the same range.
"Kali has no internet."
Make sure Adapter 1 is set to NAT. Restart the network service or reboot the VM. Check the DNS settings.
"The screen will not resize or copy-paste does not work."
Install or reinstall the guest additions or VMware tools, then restart the VM.
"My USB Wi-Fi adapter is not detected."
Enable USB passthrough in your hypervisor, attach the adapter to the VM and make sure the adapter chipset supports monitor mode. This matters for the wireless lessons later in the course.
Level Up: Where to Go After Your Basic Lab
Once you are comfortable, you can grow the lab step by step.
Add a Firewall or Router VM
Tools like pfSense let you build a more realistic network with proper segments. It teaches you about firewalls, routing and network design.
Build an Active Directory Lab
Most companies run on Active Directory. Setting up a small domain with a Windows Server and a couple of Windows clients opens a huge area of practice. It is a major skill for professional pentesters.
Create a Defensive Side
Add a logging or monitoring machine, such as a basic SIEM setup, so you can see your own attacks from a defender's view.
This "purple team" thinking, learning both attack and defence, makes you far more valuable.
Practise a Wireless Setup
Use a spare router as your own test network, and a compatible USB adapter. This lets you practise wireless security without touching anyone else's Wi-Fi.
Combine with Online Platforms
A local lab pairs nicely with online platforms:
- TryHackMe for guided, beginner-friendly rooms
- Hack The Box for more realistic challenges
- PortSwigger Web Security Academy for free, high-quality web security training
- OverTheWire for Linux and security wargames
These give you ready-made, legal targets when you want variety.
Can You Build a Lab on a Weak Computer?
Yes, with some adjustments.
If you have 4 GB of RAM, run only one VM at a time. Use a lightweight Kali desktop environment, such as Xfce, which is the default and lighter than many alternatives. Close other programs. Use online platforms like TryHackMe for targets, so you only need Kali locally.
If your computer cannot run virtual machines at all, a cloud-based browser lab is a good fallback. Several platforms provide an in-browser attacker machine, so you need only a web connection.
Limited hardware is a reason to be creative, not a reason to quit.
How Long Does It Take to Set Up a Lab?
For a first-timer, expect about two to four hours. Most of that is downloading and getting the network right.
The second time, it takes less than an hour. By the third time, you will be able to rebuild a lab from scratch while chatting with a friend.
Do not rush. A clean setup saves you from confusion for months.
Your Lab Setup Checklist
Use this list to confirm you are ready.
- Virtualisation is enabled in BIOS
- VirtualBox or VMware is installed
- Kali Linux downloaded from the official site and checksum verified
- Default password changed and system updated
- Kali has a NAT adapter and a host-only or internal adapter
- At least one vulnerable target installed in host-only or internal mode
- Isolation tested (target cannot reach the internet)
- Clean snapshots taken for every machine
- A notes file created for lab write-ups
- Personal data kept out of the lab
If every box is ticked, you have a safe, working hacking lab.
What Is the Real Purpose of a Lab? (Beyond the Tools)
Let me say something that does not appear in most tutorials.
A lab is not only about tools. It trains your mindset.
It teaches you to be careful before you click, to think about scope before you scan and to write down what you did. Those are the habits of a trustworthy professional.
Companies hire pentesters not just because they can break things. They hire them because they can be trusted with access. A lab is where trust begins.
That is also why Mission 100K focuses on teaching ethics right alongside technique.
Mission 100K: Why We Teach This for Free
I run EINITIAL24 ACADEMY with one clear goal: to make quality cybersecurity and tech education free for everyone.
There are already 300+ videos on the channel, covering cybersecurity, ethical hacking, development, digital forensics, digital marketing, AI and more. The Kali Linux series goes live every other day, and every lesson builds on the one before it.
So much good knowledge sits behind expensive courses. A student in a small town should not have to choose between food and learning. Mission 100K exists so that nobody has to.
I will be honest with you. The channel is still small, and growing it takes patience. Your support matters more than you might think.
When you watch a lesson, share a post or invite a friend, you are helping this mission reach one more person who needed it.
How You Can Help Mission 100K
If this guide helped you, here are five small things you can do. Each takes less than a minute.
- Watch the playlist: Kali Linux Complete Course 2026
- Subscribe to EINITIAL24 ACADEMY and turn on notifications
- Like and comment on the lessons you enjoy, and tell me what you want next
- Share this blog with a friend who wants to start ethical hacking
- Share your lab setup in the comments so others can learn from it
Every view and every subscriber helps free education travel further.
Frequently Asked Questions
Is it safe to build a hacking lab at home?
Yes, if you keep your vulnerable machines isolated in host-only or internal networks, use only official downloads and never test systems you do not own.
Do I need to pay for any software?
No. VirtualBox, Kali Linux, Metasploitable, DVWA, Juice Shop and many other lab tools are free. Always check licensing terms for commercial software like VMware if you use it.
How much RAM do I need for a hacking lab?
8 GB is a practical minimum for running Kali and one target. 16 GB is more comfortable for several machines.
Can I use Kali Linux on Windows without a virtual machine?
You can use WSL for command-line tools, but a full virtual machine is better for a complete lab, especially for graphical tools and wireless testing.
Is it legal to practise hacking at home?
Yes, as long as you practise on your own systems or on targets designed for learning. Testing other people's systems without permission is illegal.
Should I use bridged or NAT networking for Kali?
Use NAT for internet access and host-only or internal networking for target communication. Avoid bridged mode for vulnerable machines.
How many virtual machines should I start with?
Start with two or three: Kali, one network target like Metasploitable and one web target like DVWA.
Can I build a lab without a powerful computer?
Yes. Use one VM at a time, a lightweight Kali setup, or online platforms like TryHackMe that give you targets in the browser.
What should I learn after building my lab?
Follow our free Kali Linux playlist in order: Linux basics, networking, reconnaissance, vulnerability scanning, password attacks, wireless security and web application testing.
Final Words
A safe hacking lab is the best investment a beginner can make, and it costs nothing but a few hours.
Build it carefully. Isolate it properly. Snapshot often. Write down what you learn.
Then start practising, one small exercise at a time.
Your next step is simple: WATCH THE KALI LINUX LAB SETUP LESSON and build along with me.
And if you want to be part of Mission 100K, subscribe to EINITIAL24 ACADEMY, and tell me in the comments which lab machine you are building first.
I read every comment. See you in the next lesson.
Disclaimer: This content is for educational purposes only. Practise only in legal, authorised environments such as your own lab or systems you have explicit written permission to test. Unauthorised access to computer systems is illegal. Use this knowledge responsibly and ethically.

Recent Blogs






 in India Structure, Role, and Opportunities for Stakeholders.jpg)